Those Dualmatic hubs sure look exactly like the Selectromatic hubs I have on my 1/2 ton. I have never had a problem with my selectros. Once a year I split them apart and re-grease them. Yes not OEM, but saving the third member from continuous revolutions is much more important and money saving not to mention quieter. Looks like your progressing along nicely with the restoration. As they say in the service "Carry on".
Zeph's Dodge WC26 Carryall Restoration
-
Dozerman51
- Sergeant Major of the Gee

- Posts: 272
- Joined: Wed Jun 26, 2013 8:18 pm
- Location:
Re: Zeph's Dodge WC26 Carryall Restoration
Hi Zeph,
Those Dualmatic hubs sure look exactly like the Selectromatic hubs I have on my 1/2 ton. I have never had a problem with my selectros. Once a year I split them apart and re-grease them. Yes not OEM, but saving the third member from continuous revolutions is much more important and money saving not to mention quieter. Looks like your progressing along nicely with the restoration. As they say in the service "Carry on".
Those Dualmatic hubs sure look exactly like the Selectromatic hubs I have on my 1/2 ton. I have never had a problem with my selectros. Once a year I split them apart and re-grease them. Yes not OEM, but saving the third member from continuous revolutions is much more important and money saving not to mention quieter. Looks like your progressing along nicely with the restoration. As they say in the service "Carry on".
-
zepher11

- G-Lieutenant General

- Posts: 4366
- Joined: Fri Aug 12, 2011 7:37 pm
- Location: The Real Northern CalifornIA
Re: Zeph's Dodge WC26 Carryall Restoration
I did notice they look a lot like the Selectro hub. They do have a nice vintage look to them. I had some of those NOS stock looking freewheeling hubs with the bearings installed for the axle. Stuck some on my WC52. I think I have a couple more sets tucked away somewhere. Not as easy to go back to four wheel drive, however.Dozerman51 wrote: ↑Sun Mar 11, 2018 8:36 pmHi Zeph,
Those Dualmatic hubs sure look exactly like the Selectromatic hubs I have on my 1/2 ton. I have never had a problem with my selectros. Once a year I split them apart and re-grease them. Yes not OEM, but saving the third member from continuous revolutions is much more important and money saving not to mention quieter. Looks like your progressing along nicely with the restoration. As they say in the service "Carry on".
-
zepher11
- G-Lieutenant General
- Posts: 4366
- Joined: Fri Aug 12, 2011 7:37 pm
- Location: The Real Northern CalifornIA
Re: Zeph's Dodge WC26 Carryall Restoration
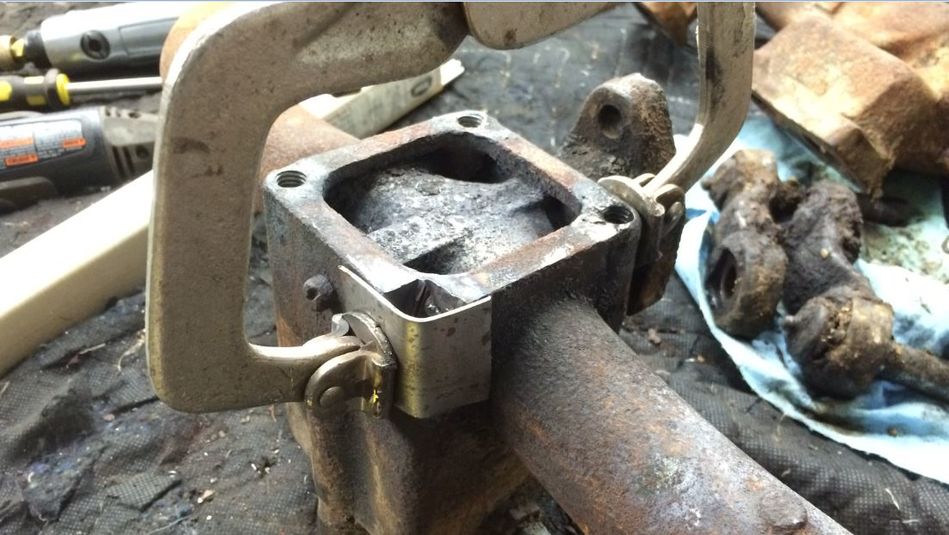
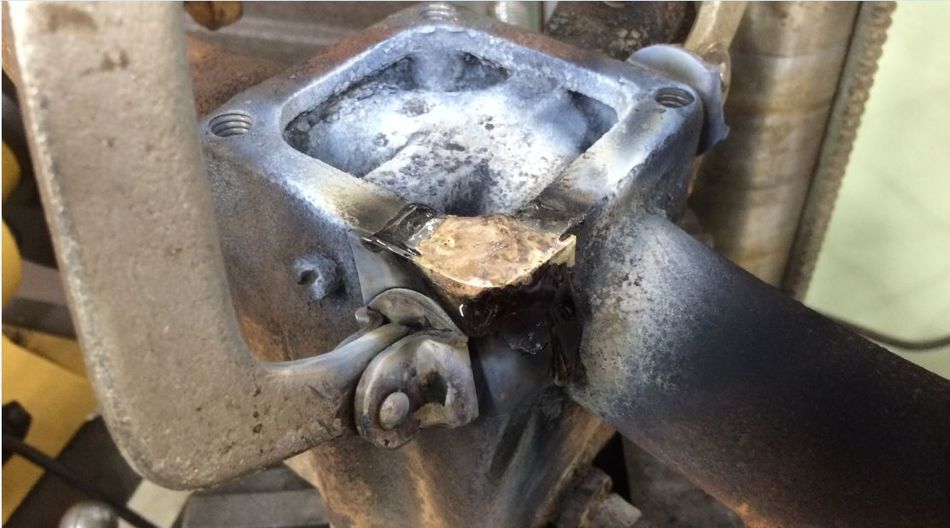
I tried to fix my early intake manifold where the bolt hole was rotted out by rust. Used brazing rod to build it up. Drilled and tapped. Had to oversize the bolt holes due to all of the threads in each hole being destroyed:

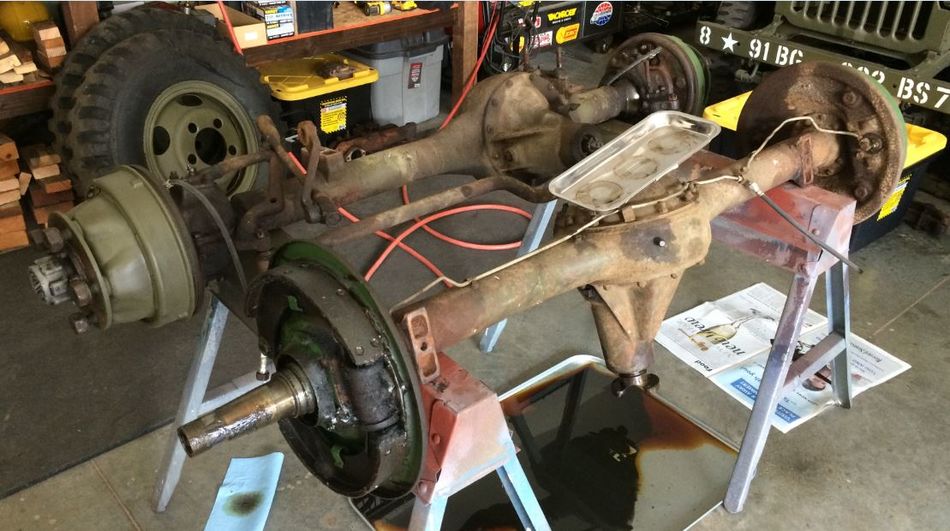
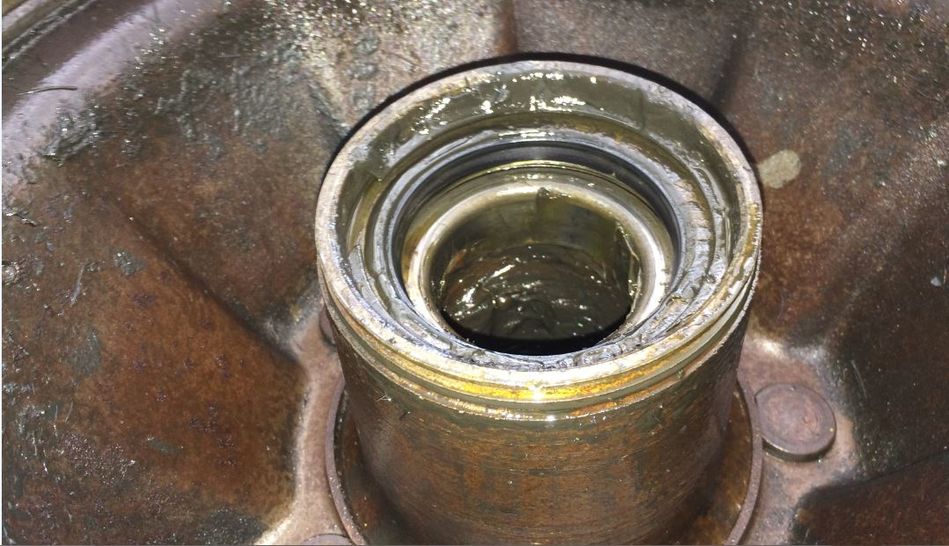
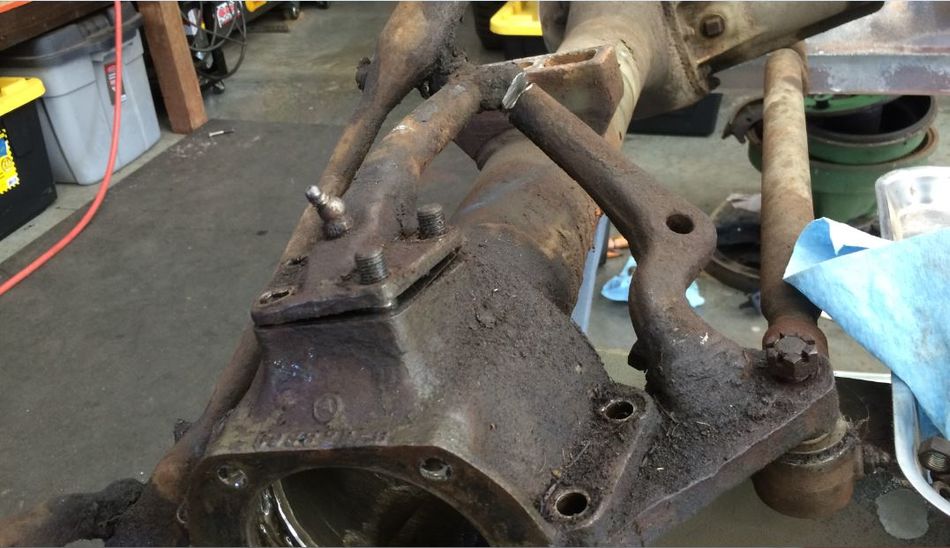
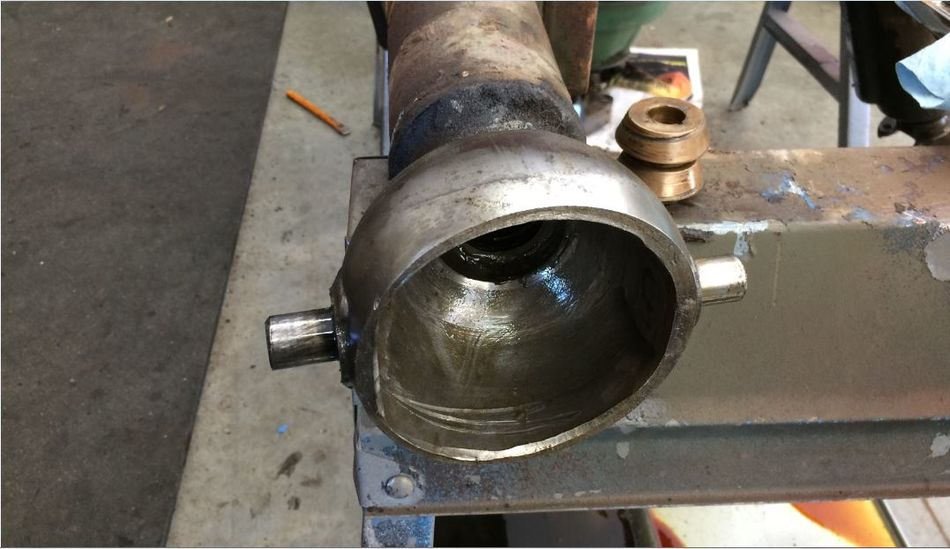
Then started the process of dismantling the axle housings:
Some of the seals had failed, so had a mix of oil and grease on one side of the rear axle. I all new seals, etc.., will be required.

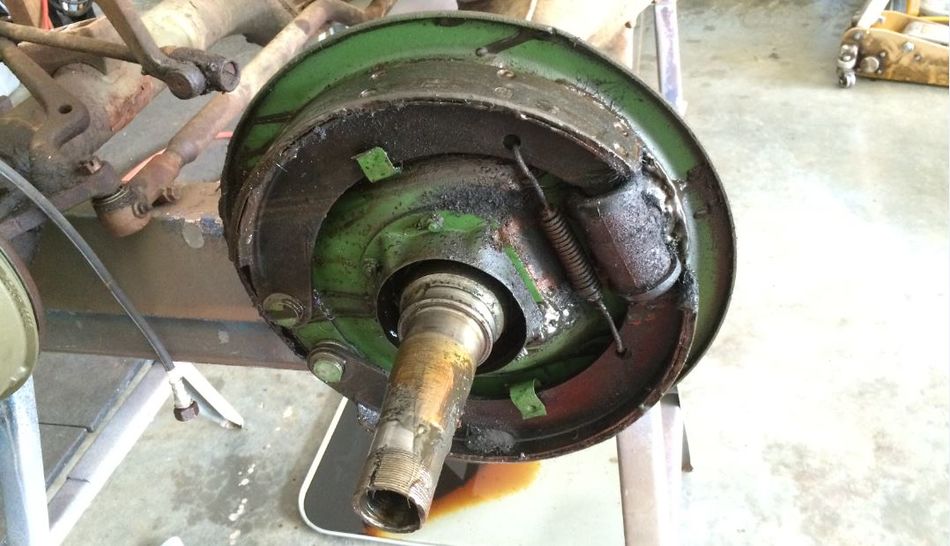
Nice and dry on this side:
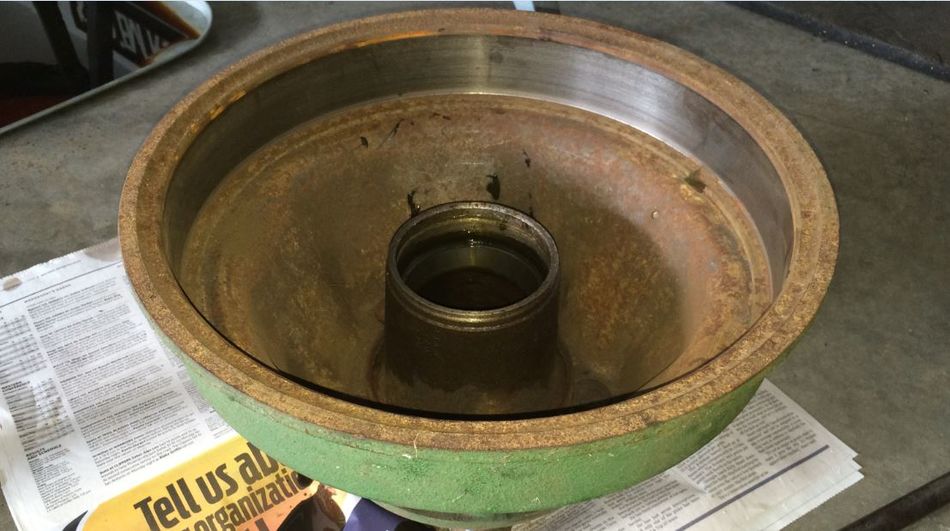
Interesting that the brake shoes on the two sides were install differently:
Then started the process of dismantling the axle housings:
Some of the seals had failed, so had a mix of oil and grease on one side of the rear axle. I all new seals, etc.., will be required.
Nice and dry on this side:
Interesting that the brake shoes on the two sides were install differently:
-
Dozerman51
- Sergeant Major of the Gee
- Posts: 272
- Joined: Wed Jun 26, 2013 8:18 pm
- Location:
Re: Zeph's Dodge WC26 Carryall Restoration
Hi Zeph,
Great work on the manifold. Wish I could braze and weld like you do. Are you going to use bolts to join the Intake and Exhaust together? That’s what I had on the 230 motor. I was able to dermel away the bolt heads and seperate the manifolds that way. I then threw a bunch of loose juice at the bottom of the blind holes in the intake manifold. There are small holes at the bottom where the studs or bolts attach. Let it all sit for a couple days while also giving the headless bolts a rap or two with a hammer. Using a vice grip, they all unscrewed from the intake manifold. Not a very good design. The 25” motors with the thru bolts are a much better design. Way easier to seperate the manifolds. I’ll give you a holler to see if we can get together next Sat. Will be up your way for the turkey season opener. Keep up the good work.
Joe Giraud
-
zepher11
- G-Lieutenant General
- Posts: 4366
- Joined: Fri Aug 12, 2011 7:37 pm
- Location: The Real Northern CalifornIA
Re: Zeph's Dodge WC26 Carryall Restoration
Hi Joe,Dozerman51 wrote: ↑Fri Mar 23, 2018 8:24 pmHi Zeph,
Great work on the manifold. Wish I could braze and weld like you do. Are you going to use bolts to join the Intake and Exhaust together? That’s what I had on the 230 motor. I was able to dermel away the bolt heads and seperate the manifolds that way. I then threw a bunch of loose juice at the bottom of the blind holes in the intake manifold. There are small holes at the bottom where the studs or bolts attach. Let it all sit for a couple days while also giving the headless bolts a rap or two with a hammer. Using a vice grip, they all unscrewed from the intake manifold. Not a very good design. The 25” motors with the thru bolts are a much better design. Way easier to seperate the manifolds. I’ll give you a holler to see if we can get together next Sat. Will be up your way for the turkey season opener. Keep up the good work.
Joe Giraud
Thanks! I'm still working on the stuck manifolds with the studs I pulled from that one engine. Those things are really stuck together. I have been soaking them for over a month and rapping the studs with the little sledge, but still no progress. I had to over drill the early intake above as all of the 5/16" threads were ruined getting the rusty bolts out, so had to oversize the holes to 3/8" and re-thread. I drilled the new brass and tapped that as well. Looks like it'll work now. I'll have to shorten the 3/8" bolts to 2.5" to fit properly. Will also need to resize the holes on the matting gasket between the two manifolds. Hopefully, it will work. If not, back to the drawing board....
Yes, let me know if you are heading up. Everywhere I go there now there are Turkeys wandering around. Even saw some wandering around in downtown Redding. My son's a bow hunter, so he has his hay bale targets set up here for him use. While he was practicing one day, there were about 25 turkey's in the field behind us. Should be a good season!
-
Dozerman51
- Sergeant Major of the Gee
- Posts: 272
- Joined: Wed Jun 26, 2013 8:18 pm
- Location:
Re: Zeph's Dodge WC26 Carryall Restoration
Hi Zeph,
Check you PM box.
Check you PM box.
-
zepher11
- G-Lieutenant General
- Posts: 4366
- Joined: Fri Aug 12, 2011 7:37 pm
- Location: The Real Northern CalifornIA
Re: Zeph's Dodge WC26 Carryall Restoration
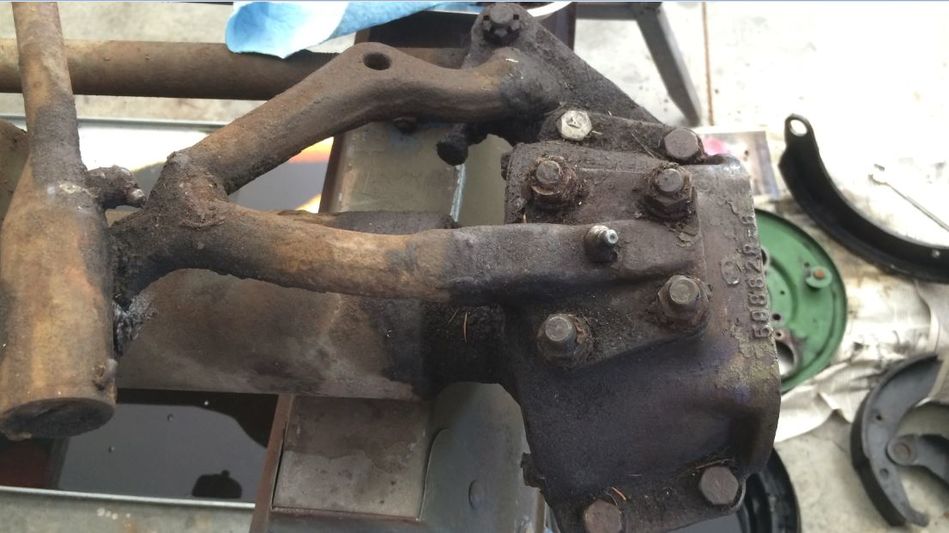
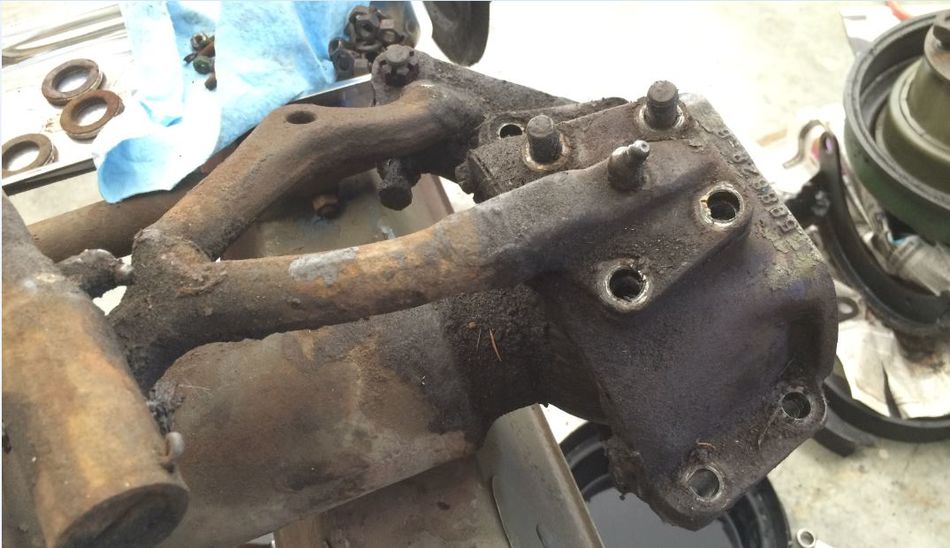
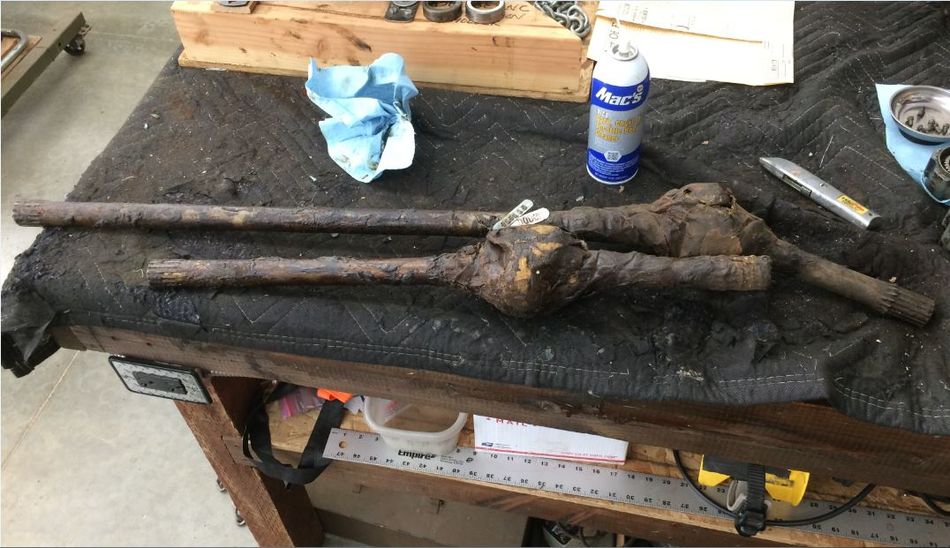
Finally had some time to dink around with the front axle disassembly. Finished removing everything so I could get the axles out and look them over:
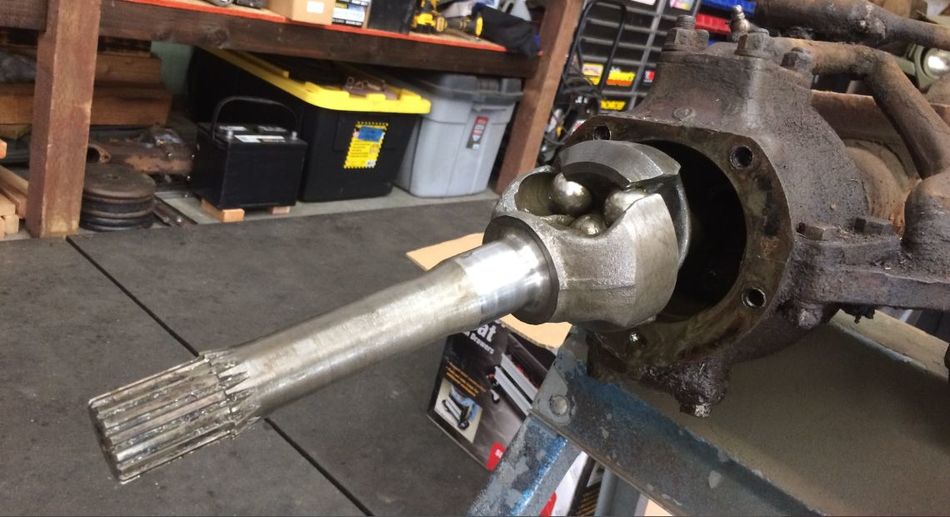
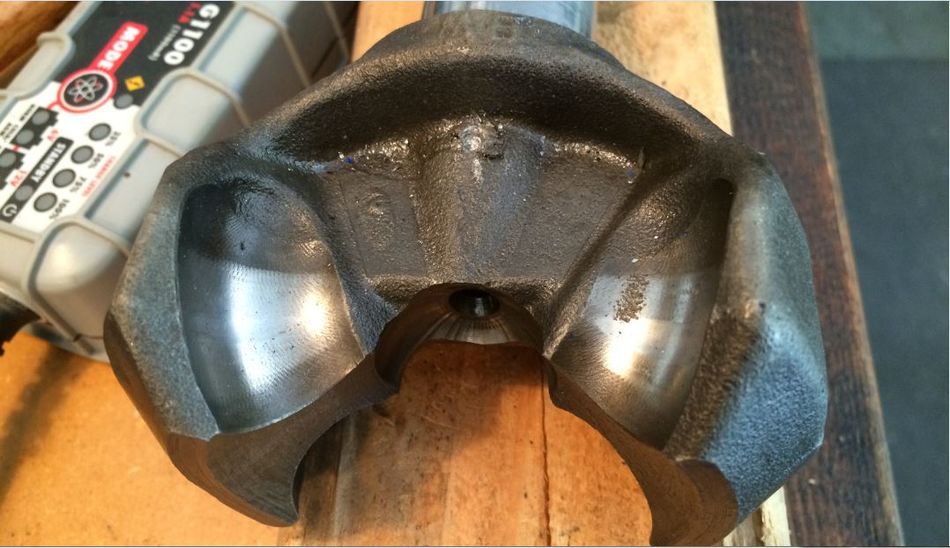
The long axle was in pretty good shape, but the short axle has major wear grooves in it from the ball bearings:

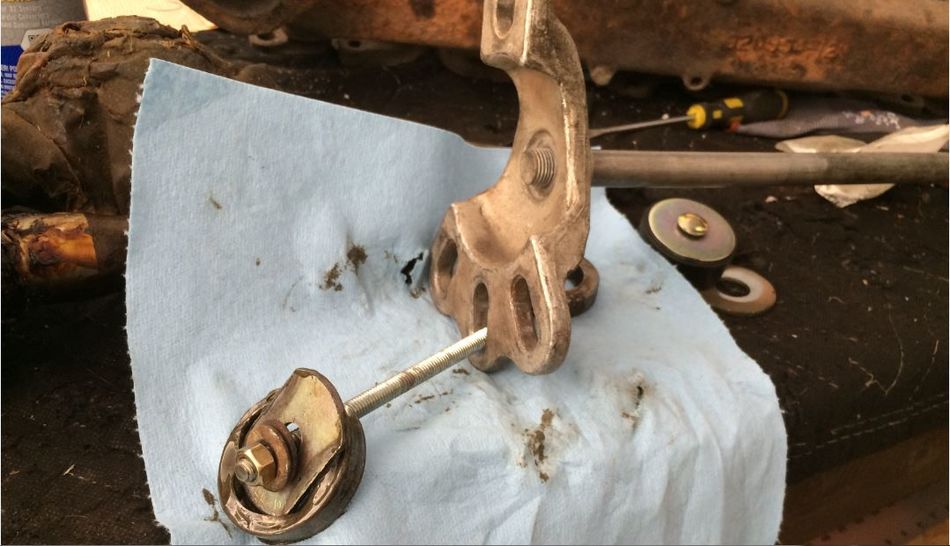
I like that the bolts all have the "A" markings. However, will have to deal with the Rube Goldberg contraption. Although I unbolted everything, I couldn't get it apart:
Had to cut a piece to get it to come apart:
Removed the upper and lower bearings to finish removal all of the knuckles:
I remembered that I had some NOS axles from the Command Car project:
These data tags on the axles were pretty cool:
Now a lot of clean up lies ahead of me to get everything cleaned up for reassembly...
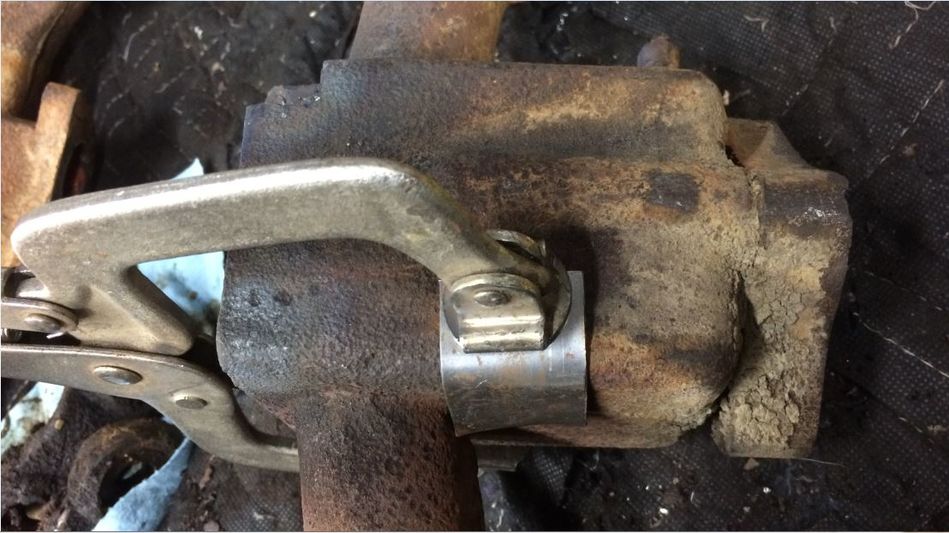
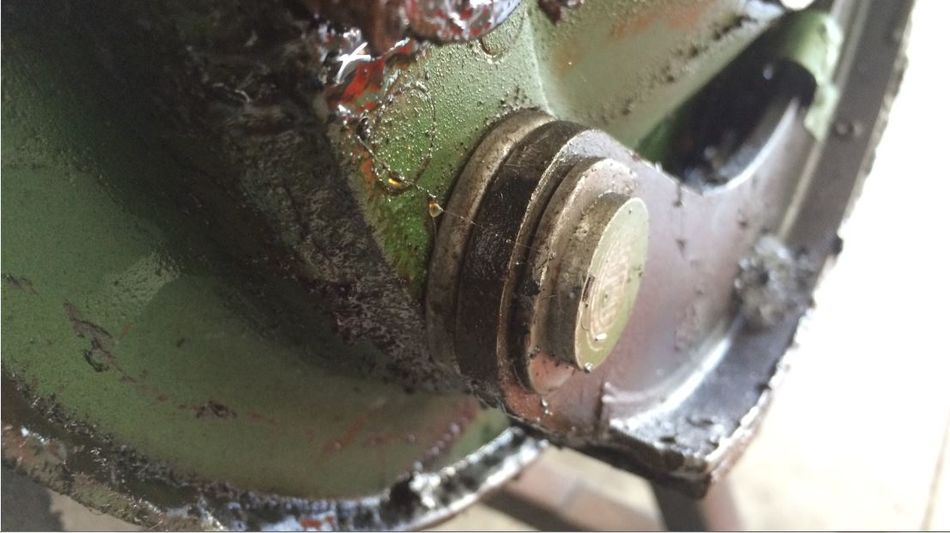
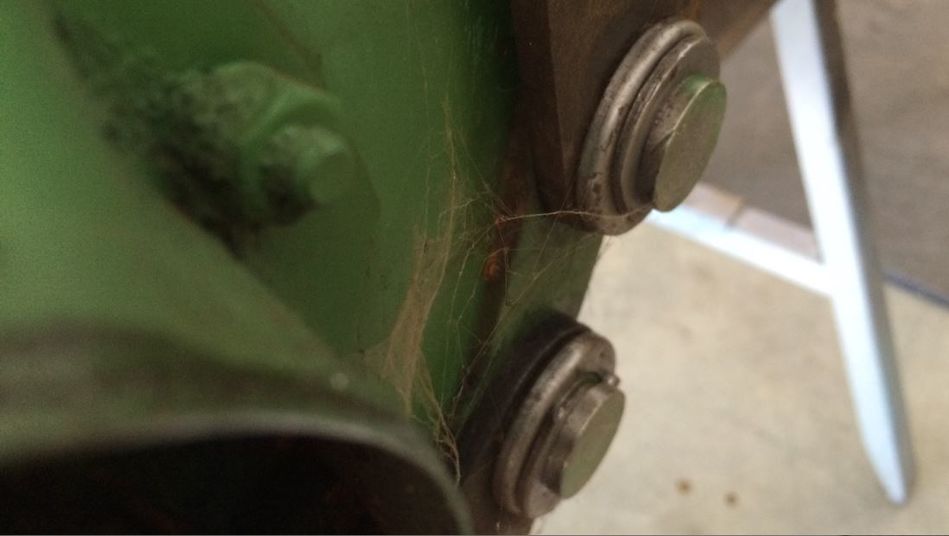
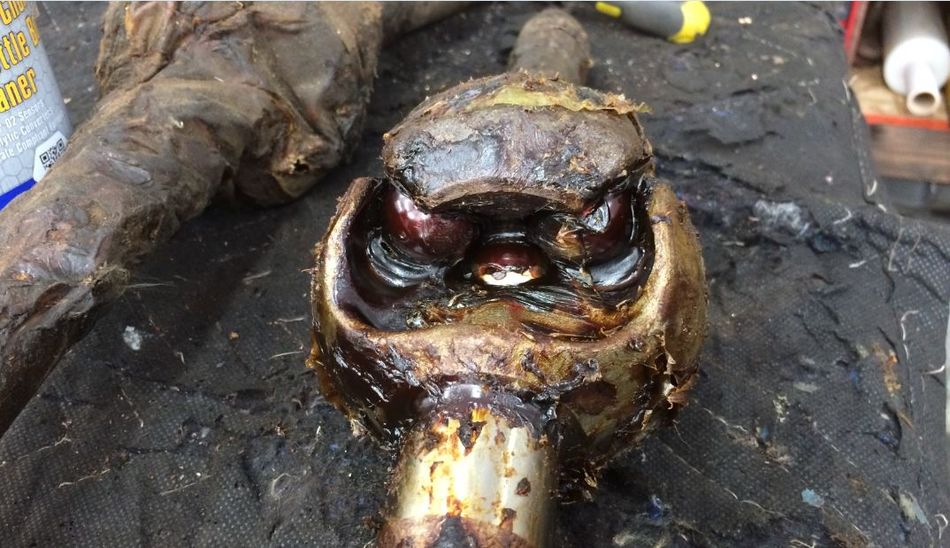
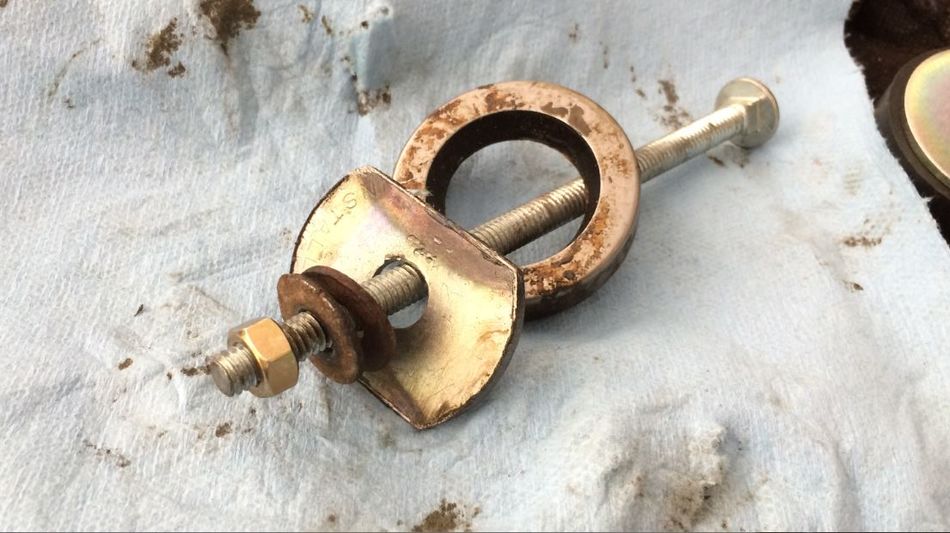
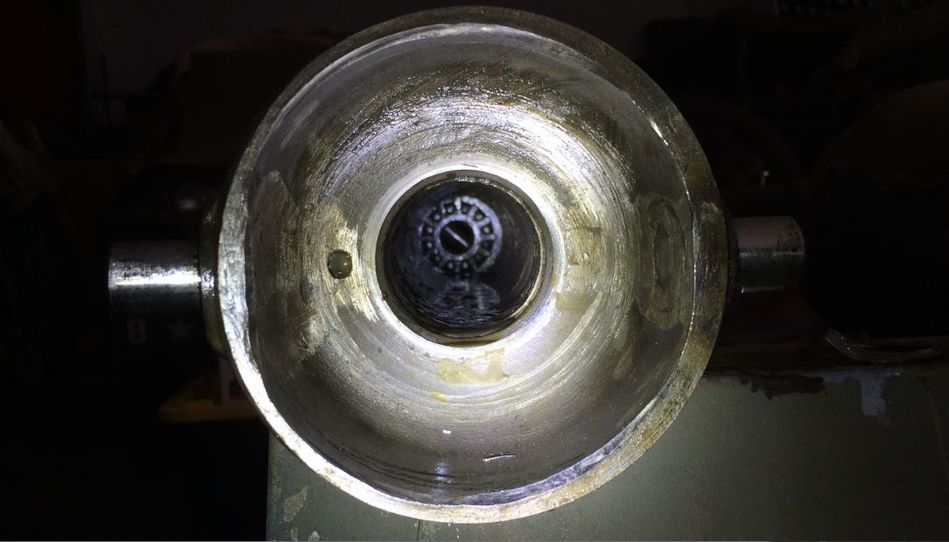
Also, I found this on the floor below the axle after I was done removing everything. I have no idea where it came from. Anyone know what this is?:

The long axle was in pretty good shape, but the short axle has major wear grooves in it from the ball bearings:
I like that the bolts all have the "A" markings. However, will have to deal with the Rube Goldberg contraption. Although I unbolted everything, I couldn't get it apart:
Had to cut a piece to get it to come apart:
Removed the upper and lower bearings to finish removal all of the knuckles:
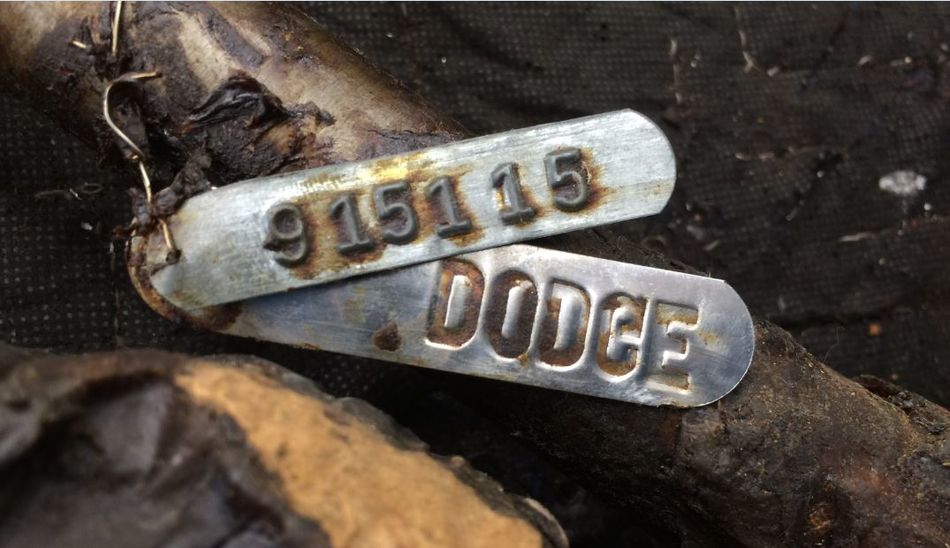
I remembered that I had some NOS axles from the Command Car project:
These data tags on the axles were pretty cool:
Now a lot of clean up lies ahead of me to get everything cleaned up for reassembly...
Also, I found this on the floor below the axle after I was done removing everything. I have no idea where it came from. Anyone know what this is?:
-
Dozerman51
- Sergeant Major of the Gee
- Posts: 272
- Joined: Wed Jun 26, 2013 8:18 pm
- Location:
Re: Zeph's Dodge WC26 Carryall Restoration
Hi Zeph,
That appears to be one of the springs for one of the Steering Knuckle tie rod ends. Both right and left have this spring. I’ll get you the part # of the metric seal for the steering box later this week. I am at China Lake NWTC visiting my son who is stationed there with his family.
That appears to be one of the springs for one of the Steering Knuckle tie rod ends. Both right and left have this spring. I’ll get you the part # of the metric seal for the steering box later this week. I am at China Lake NWTC visiting my son who is stationed there with his family.
-
zepher11
- G-Lieutenant General
- Posts: 4366
- Joined: Fri Aug 12, 2011 7:37 pm
- Location: The Real Northern CalifornIA
Re: Zeph's Dodge WC26 Carryall Restoration
Thanks Joe. I did remove the steering link, so that is what it is. I didn't even notice or think of that. Thanks!Dozerman51 wrote: ↑Sat Apr 07, 2018 9:05 pmHi Zeph,
That appears to be one of the springs for one of the Steering Knuckle tie rod ends. Both right and left have this spring. I’ll get you the part # of the metric seal for the steering box later this week. I am at China Lake NWTC visiting my son who is stationed there with his family.
Sounds good on the steering box seal.
Thank you,
-
Dozerman51
- Sergeant Major of the Gee
- Posts: 272
- Joined: Wed Jun 26, 2013 8:18 pm
- Location:
Re: Zeph's Dodge WC26 Carryall Restoration
Zeph,
The National oil seal number for the metric seal 32x42x7. This seal should stop the 90WT from exiting out the sector shaft.
The National oil seal number for the metric seal 32x42x7. This seal should stop the 90WT from exiting out the sector shaft.
-
zepher11
- G-Lieutenant General
- Posts: 4366
- Joined: Fri Aug 12, 2011 7:37 pm
- Location: The Real Northern CalifornIA
Re: Zeph's Dodge WC26 Carryall Restoration
Thanks Joe. I just picked one up off ebay for $5. Can't beat that around here.Dozerman51 wrote: ↑Wed Apr 11, 2018 6:59 pmZeph,
The National oil seal number for the metric seal 32x42x7. This seal should stop the 90WT from exiting out the sector shaft.
Pleasure having you, Syl and your cousin stop by for a visit. Maybe see you fellas down at Petaluma week after next.
-
zepher11
- G-Lieutenant General
- Posts: 4366
- Joined: Fri Aug 12, 2011 7:37 pm
- Location: The Real Northern CalifornIA
Re: Zeph's Dodge WC26 Carryall Restoration
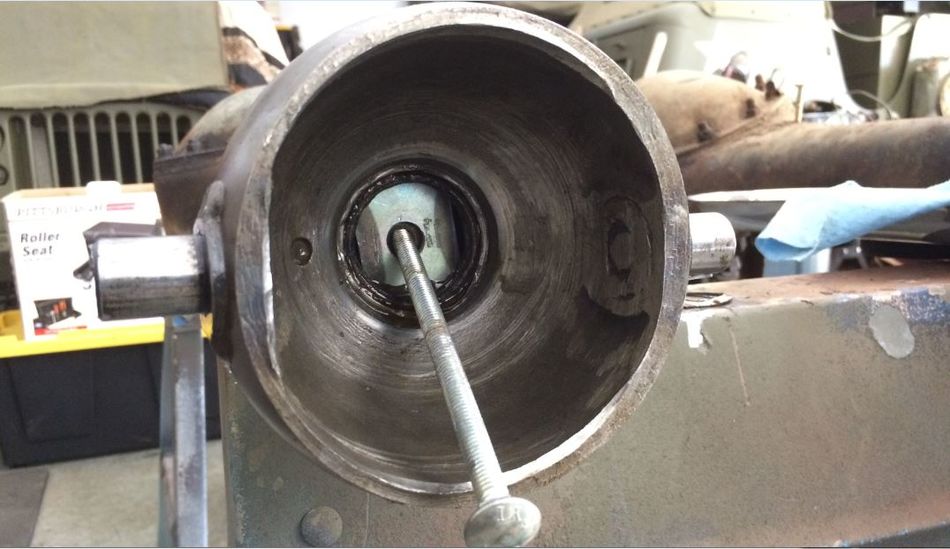
I spent some time this afternoon to try and get the inner axle seals out of the front axle housing. Tried several different ways to get the old ones out. First tried the seal puller/pry tool with no luck. Then used the inside bushing bearing puller with no luck. Finally decided to make my own puller. I used a rubber expansion plug washer as I didn't have any standard washers large enough. Ground it down to the diameter of the seal. I then ground opposing sides to allow it to slip behind the axle seal. I then used my axle puller slide hammer to hammer them out. The long side came out fairly easy, but the long side axle seal put up a fight. Bent the washer pretty good. Almost gave up to work on another solution, but decided to give it one more go and finally came out after about 20 more good blows:
Then spent about four hours trying to remove the pin in the short axle. Broke and bent all my punches as well as a number of others I made up. Anyone have a recommendation for a punch set that won't bend or break off when using for this purpose?:
Then spent about four hours trying to remove the pin in the short axle. Broke and bent all my punches as well as a number of others I made up. Anyone have a recommendation for a punch set that won't bend or break off when using for this purpose?:
-
chibobber
- Sergeant Major of the Gee
- Posts: 361
- Joined: Sun Dec 05, 2010 12:10 am
- Location:
Re: Zeph's Dodge WC26 Carryall Restoration
Zeph,
Use a starter punch.Starter punch is only a little stub that should get the the pin moving,then switch to the standard punch to finish the drive.
Bob
Use a starter punch.Starter punch is only a little stub that should get the the pin moving,then switch to the standard punch to finish the drive.
Bob
-
zepher11
- G-Lieutenant General
- Posts: 4366
- Joined: Fri Aug 12, 2011 7:37 pm
- Location: The Real Northern CalifornIA
Re: Zeph's Dodge WC26 Carryall Restoration
Thanks Bob. Darn thing has already destroyed a number of punches. I made a few starter style punches yesterday with the same result. I was just googling starter punches and seems most are for roll pins and have hollow ends. I finally found a solid end set that looks okay, but still worried they will disintegrate as well. These look like the strongest I can find online, but not a lot of information on these:
- Starter Punches
- CC 21.JPG (48.04 KiB) Viewed 2100 times
-
chibobber
- Sergeant Major of the Gee
- Posts: 361
- Joined: Sun Dec 05, 2010 12:10 am
- Location:
Re: Zeph's Dodge WC26 Carryall Restoration
Zeph,
Hope it all works out.As stated in a prior post,I would try and locate and cultivate a machine shop that has an EDM. If it can blast a broken tap out of a host metal,it should work on the pin.
Bob
Hope it all works out.As stated in a prior post,I would try and locate and cultivate a machine shop that has an EDM. If it can blast a broken tap out of a host metal,it should work on the pin.
Bob
Who is online
Users browsing this forum: Google [Bot] and 51 guests